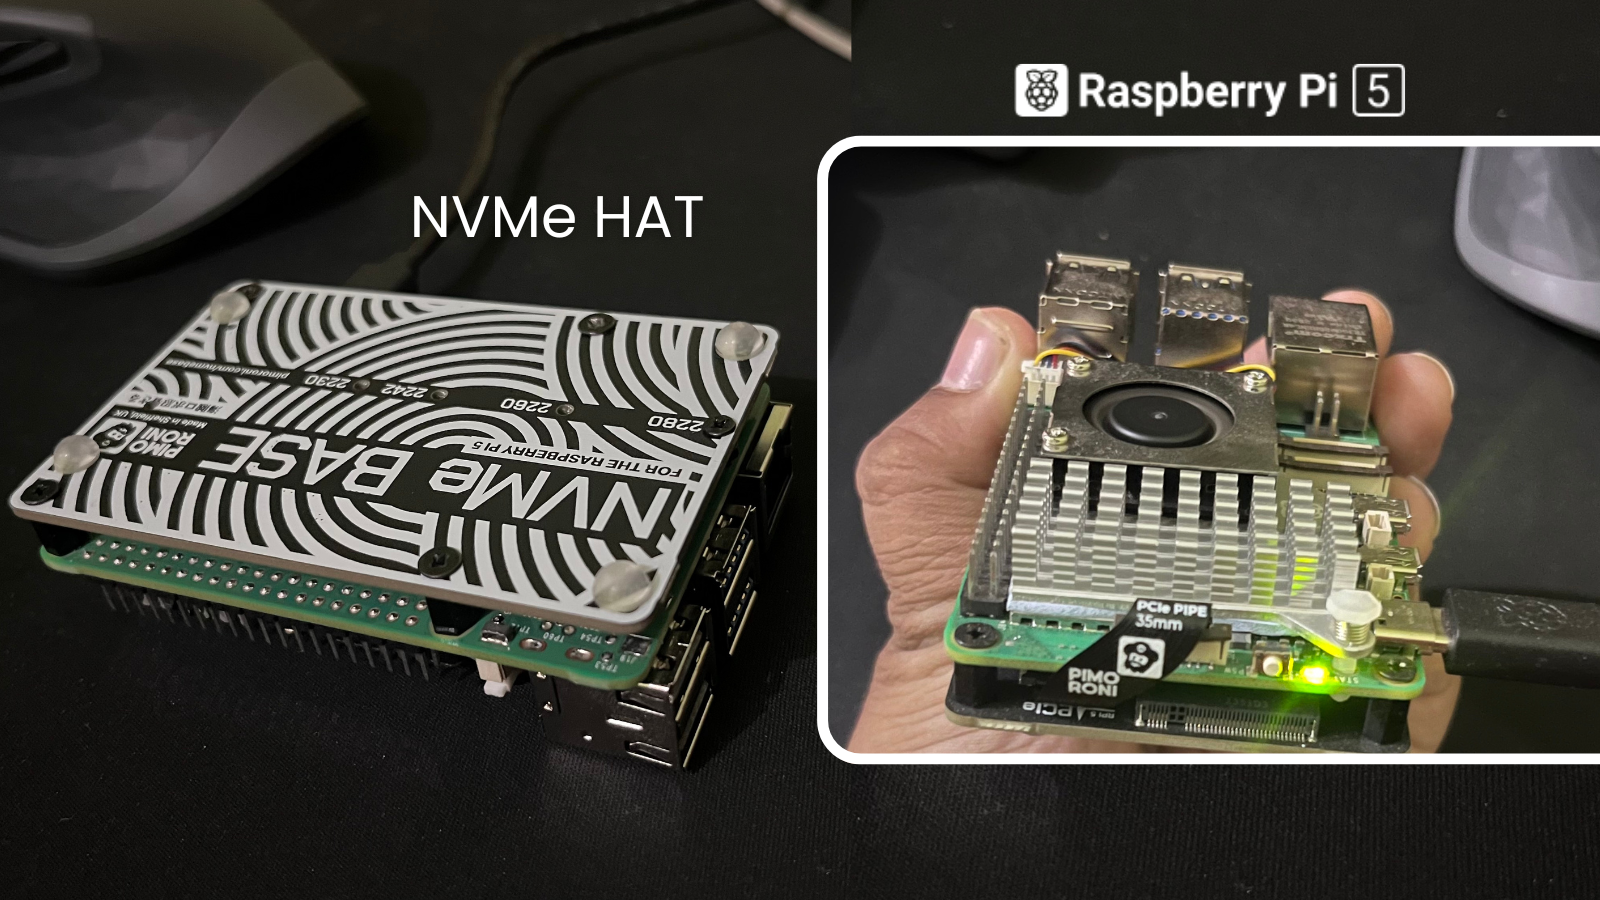
Recently I bought the Raspberry Pi 5 to create a simple NAS that doesn’t require a lot of resources and consumes less power. The standard adapter that comes with the Pi is 27 watts, which is low compared to other mini PCs and workstation systems, consuming more than 45 watts on average.
Choosing the Pi over a refurbished laptop seemed like a better option to me because those old laptops might not be as reliable compared to the Pi. With the Pi, I know I have more than sufficient resources to run workloads, especially with 8GB of RAM.
Later, I learned from Jeff’s videos that there is a possibility of running M.2 SSDs or even SATA SSDs using a HAT (Hardware Attached on Top). These attachment boards are easy to work with and don’t require a lot of technical expertise. So, I started searching for an NVMe HAT for the Raspberry Pi 5. However, the HAT that Jeff was using isn’t easily available in India. I had to look for an alternative and found the Pimoroni NVMe HAT. Again, it was available, but I needed an Indian vendor who could offer it at a similar rate to the official website. I found the same model and brand on ThingsBit at a reasonable price of 2000 INR.
So, I bought it and also purchased a 128GB M.2 NVMe (EVM 128GB Internal SSD - M.2 NVMe PCIe (2280)) from Amazon for 1200 INR.
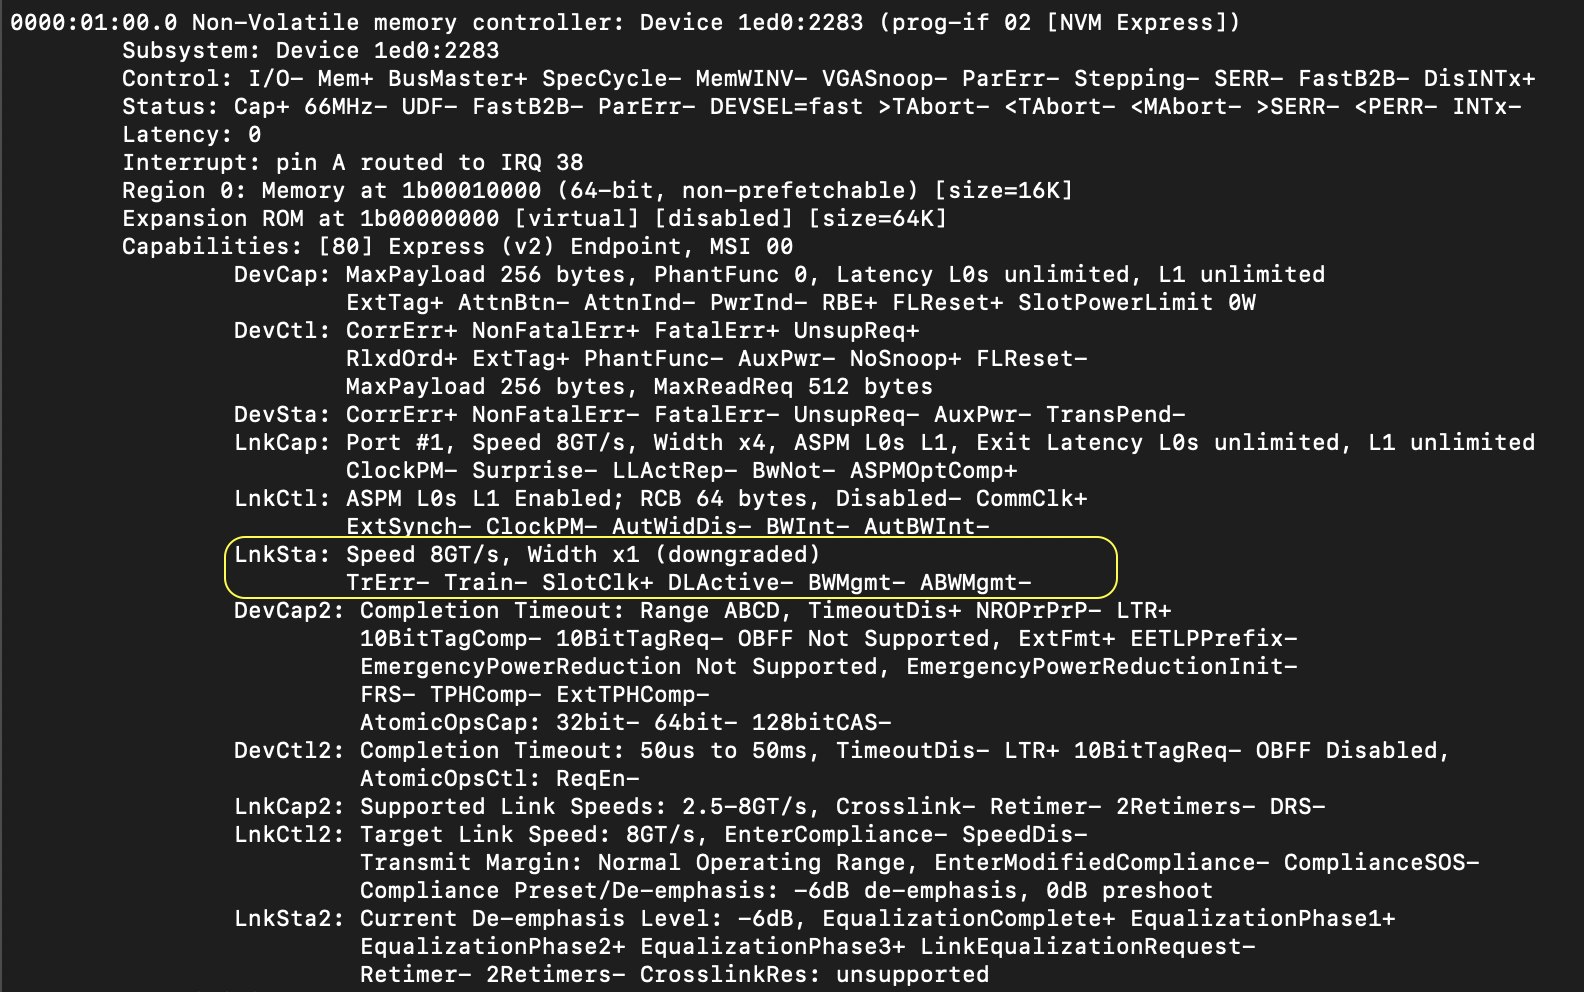
Below is the lspci --vvvv output, showing link speed LnkSta: Speed 5GT/s, Width x4,

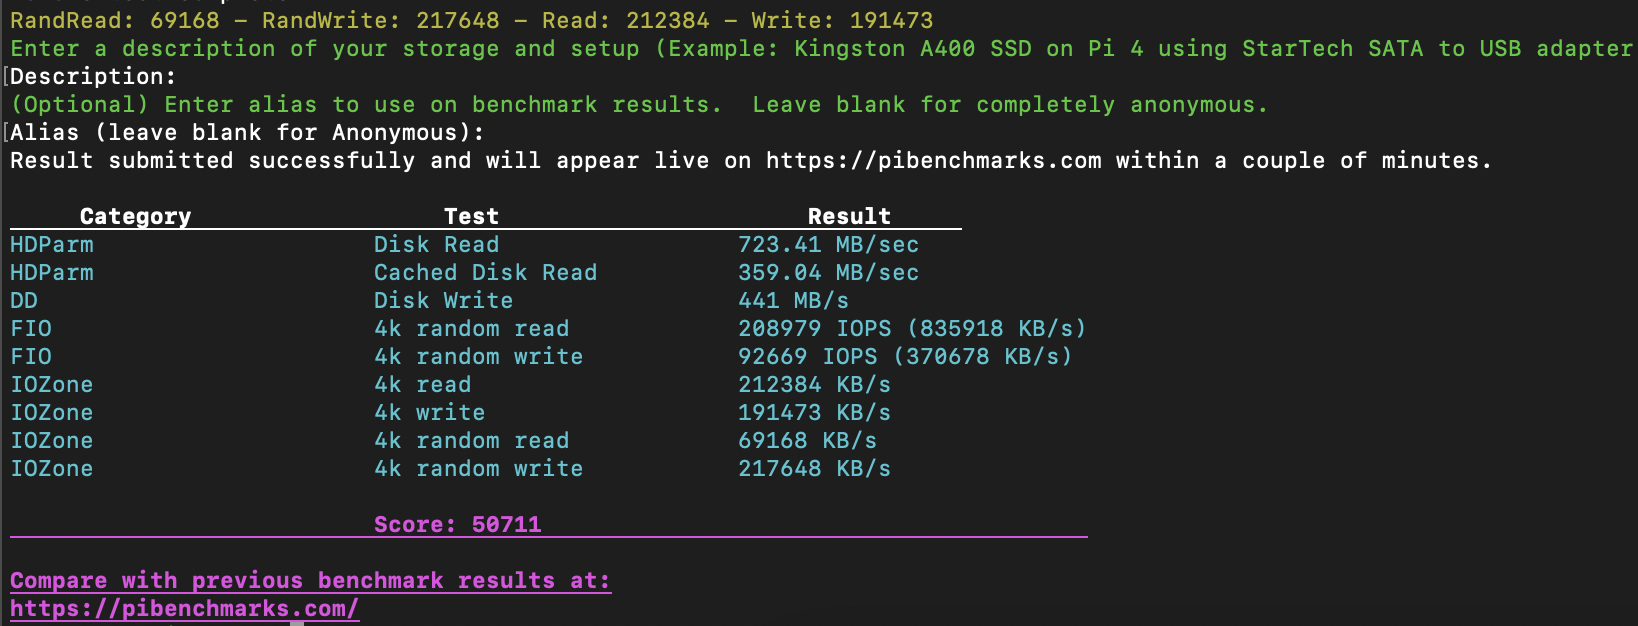
and below is the benchmark result using https://pibenchmarks.com/

Note: I followed the guide provided by the Pimoroni official website to force the Raspberry Pi to use PCIe Gen 3. Below are the steps copied from the source website.
Firmware
For the most hassle-free experience, make sure your Raspberry Pi OS is up to date, and your RPi 5 firmware is updated to 2023-12-06 (Dec 6th) or newer. This supports all the features of the RPi PCIe spec and means you don’t have to mess with config files to get started.
Software update on the RPi OS should do this for you, but to force it you can:
- Open a Terminal (Ctrl-Alt-T)
- Run
sudo raspi-configand choose ‘Latest’ under Advanced Options > Bootloader Version. - Run
sudo rpi-eeprom-updatein the Terminal will tell you which version of firmware is running.
PCIe 3 Mode
To enable experimental and not-officially-supported PCIe 3 mode, add the following line to the [all] section at the end of your Raspberry Pi /boot/firmware/config.txt file like this:
[all]
dtparam=pciex1_gen=3
Save and reboot - your drive is ready to use!
Conclusion
I’m happy with the result of the NVMe HAT. It removed the bottleneck of using an SD card as a boot device, decreasing the chances of unwanted failures with SD cards, and also opened up more possibilities. For your information, I’m running Vaultwarden, Plex, Torrent, OMV, and so on. Because of the SSD speed, it seems to be working out well for me, with no noticeable lags or performance issues.